EWS and Driver Door Lock Removal Procedure
Works for: 2001-2006 Mini Cooper Hatchback, 2005-2008 Mini Cooper Convertible and 2001-2006 Mini Cooper S Hatchback
EWS Removal Procedure
Tools Needed: 10mm deep socket and ratchet
Removal Time: 10 Minutes
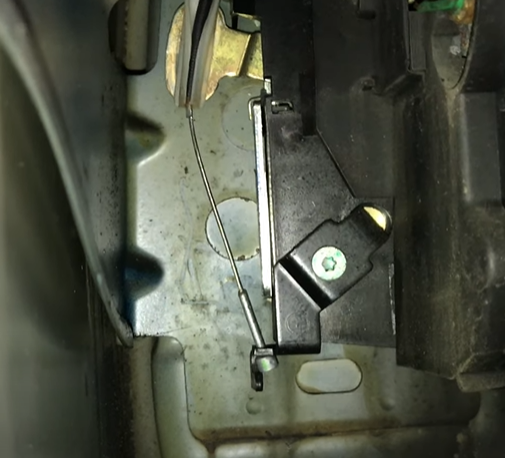
You may be wondering what the process is to remove the EWS from your Mini Cooper. The procedure is pretty simple, as the module is right above the brake pedal on the driver’s side area. All that is needed is a 10mm deep socket or shallow socket with a short extension to remove the two 10mm nuts that hold the module to the firewall. Once removed, the EWS can be pulled down, remove the wire harness that is attached to the system. With the immobilizer removed, all that is left to remove is the driver door lock.

EWS Location for Mini Cooper
Driver Door Lock Removal Procedure
Tools Needed: T25 Torx Driver, 5 mm Allen head wrench, Flat head
Removal Time: 20 minutes
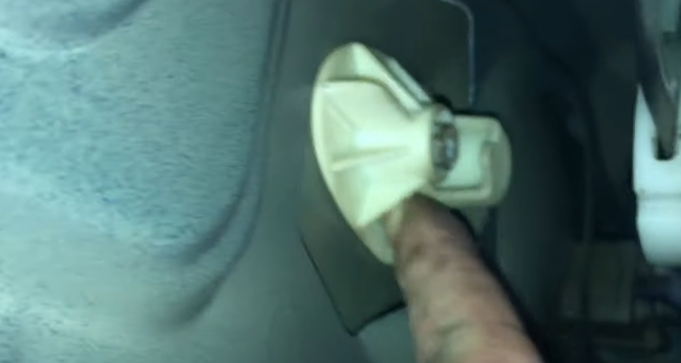
1. Plastic Bezel Removal
First open the driver door and start by removing the plastic bezel for the tweeter speaker and door handle. It can be removed with a flat head, or you can simply pull it with your fingers with enough force.

Tweeter speaker and door handle bezel removal
2. Remove T25 Bolts That Hold Panel To Door
After that, grab your T25 driver and remove the 4 bolts that hold the door panel to the door, noting the fourth bolt will be hidden behind the red reflector that sits below the door lock stem, this will need to be popped off in order to gain access to remove the bolt. Now grab the bottom of the panel and slowly work your way around it pulling it off by snapping the plastic connectors that connect the door gently. The speaker cable will need to be disconnected in order to fully remove the panel. Sit it aside.

Removing T25 bolts that hold door panel to door
3. Detach Door Handle Cable
Look in the inside of the door panel you will see a cable attached to the door latch assembly. This needs to be removed or the door handle will not come out. Rotate and fish out the cable end so that it is no longer attached.
Door latch cable needs to be removed on inside of door
4. Door Handle Bracket Removal
Now find the white bracket that holds the door handle to the door, there is a 5mm allen head bolt that holds the bracket. Loosen and remove it with the allen head wrench. Now the door handle can be removed.
5mm allen head bolt needs to be removed
5. Door Lock Bolt
Next, go to the side of the door, you may need to remove a rubber grommet to gain access to the bolt that needs to be removed. Remove the bolt with a T25 torx bit.
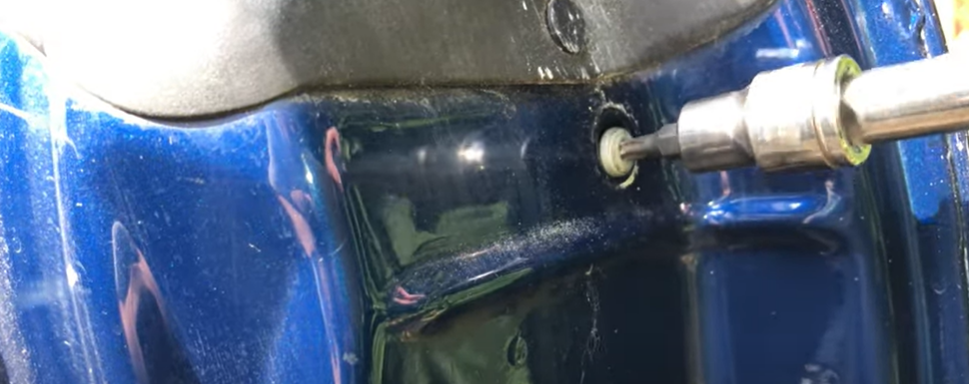
Remove T25 bolt that holds the door lock to the door panel
6. Removing Door Lock
Locate the bolt that’s attached to the door lock, we were able to get a T25 driver through a hole on the door panel and grab it an angle and slowly rotate it loose. Once it’s loosened all the way, go to the outside of the door and try to wiggle the door lock inside the panel, with a little wiggling the door lock will come out, the stem may need to be rotated all the way to the left or right in order to get it out. You will be pulling it out through the inside of the door.
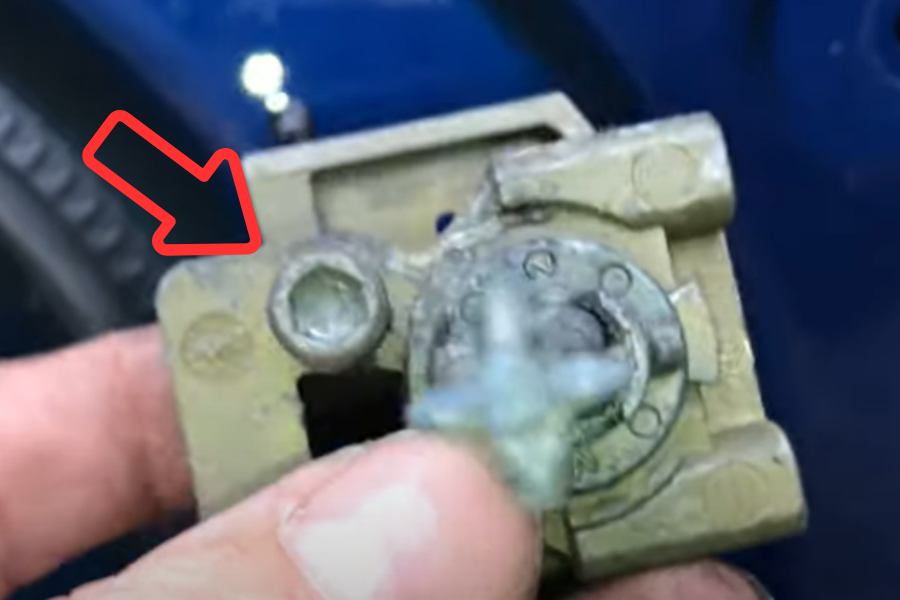
Allen head bolt that needs to be removed in order to remove door lock
All that’s left to do is box up your parts and print the shipping label off that was emailed to you after purchasing one of our services or take the email into any USPS center and have them print it for you and package it.

Don’t forget to package both your EWS and door lock